install LED under-cabinet lighting
Discover how to install LED lighting under-cabinet lighting and transform your kitchen space with vibrant, efficient illumination. Learn more now!
Have you ever been in the kitchen chopping ingredients for dinner or washing a pot wishing you had a little overhead lighting to see what you were doing. While pendant lighting can look great, they don’t always provide enough illumination in your kitchen when you need it the most. The solution? Under-cabinet LED lighting!
Elevate your kitchen with LED lighting panels, as they provide warm, accent lighting to a room when you don’t necessarily want the entire space illuminated. Having an LED panel also boosts functionality by brightening those high-use spots, like benchtops and prep areas.

types of cabinet LED lighting
You can use LED panels on their own or create a strip lighting effect by linking them together. Our panels are available in 400mm, 450mm, 600mm and 900mm lengths.
The number of panels you need depends on the type of lighting effect you want to create.
step-by-step installation process
tools and materials needed
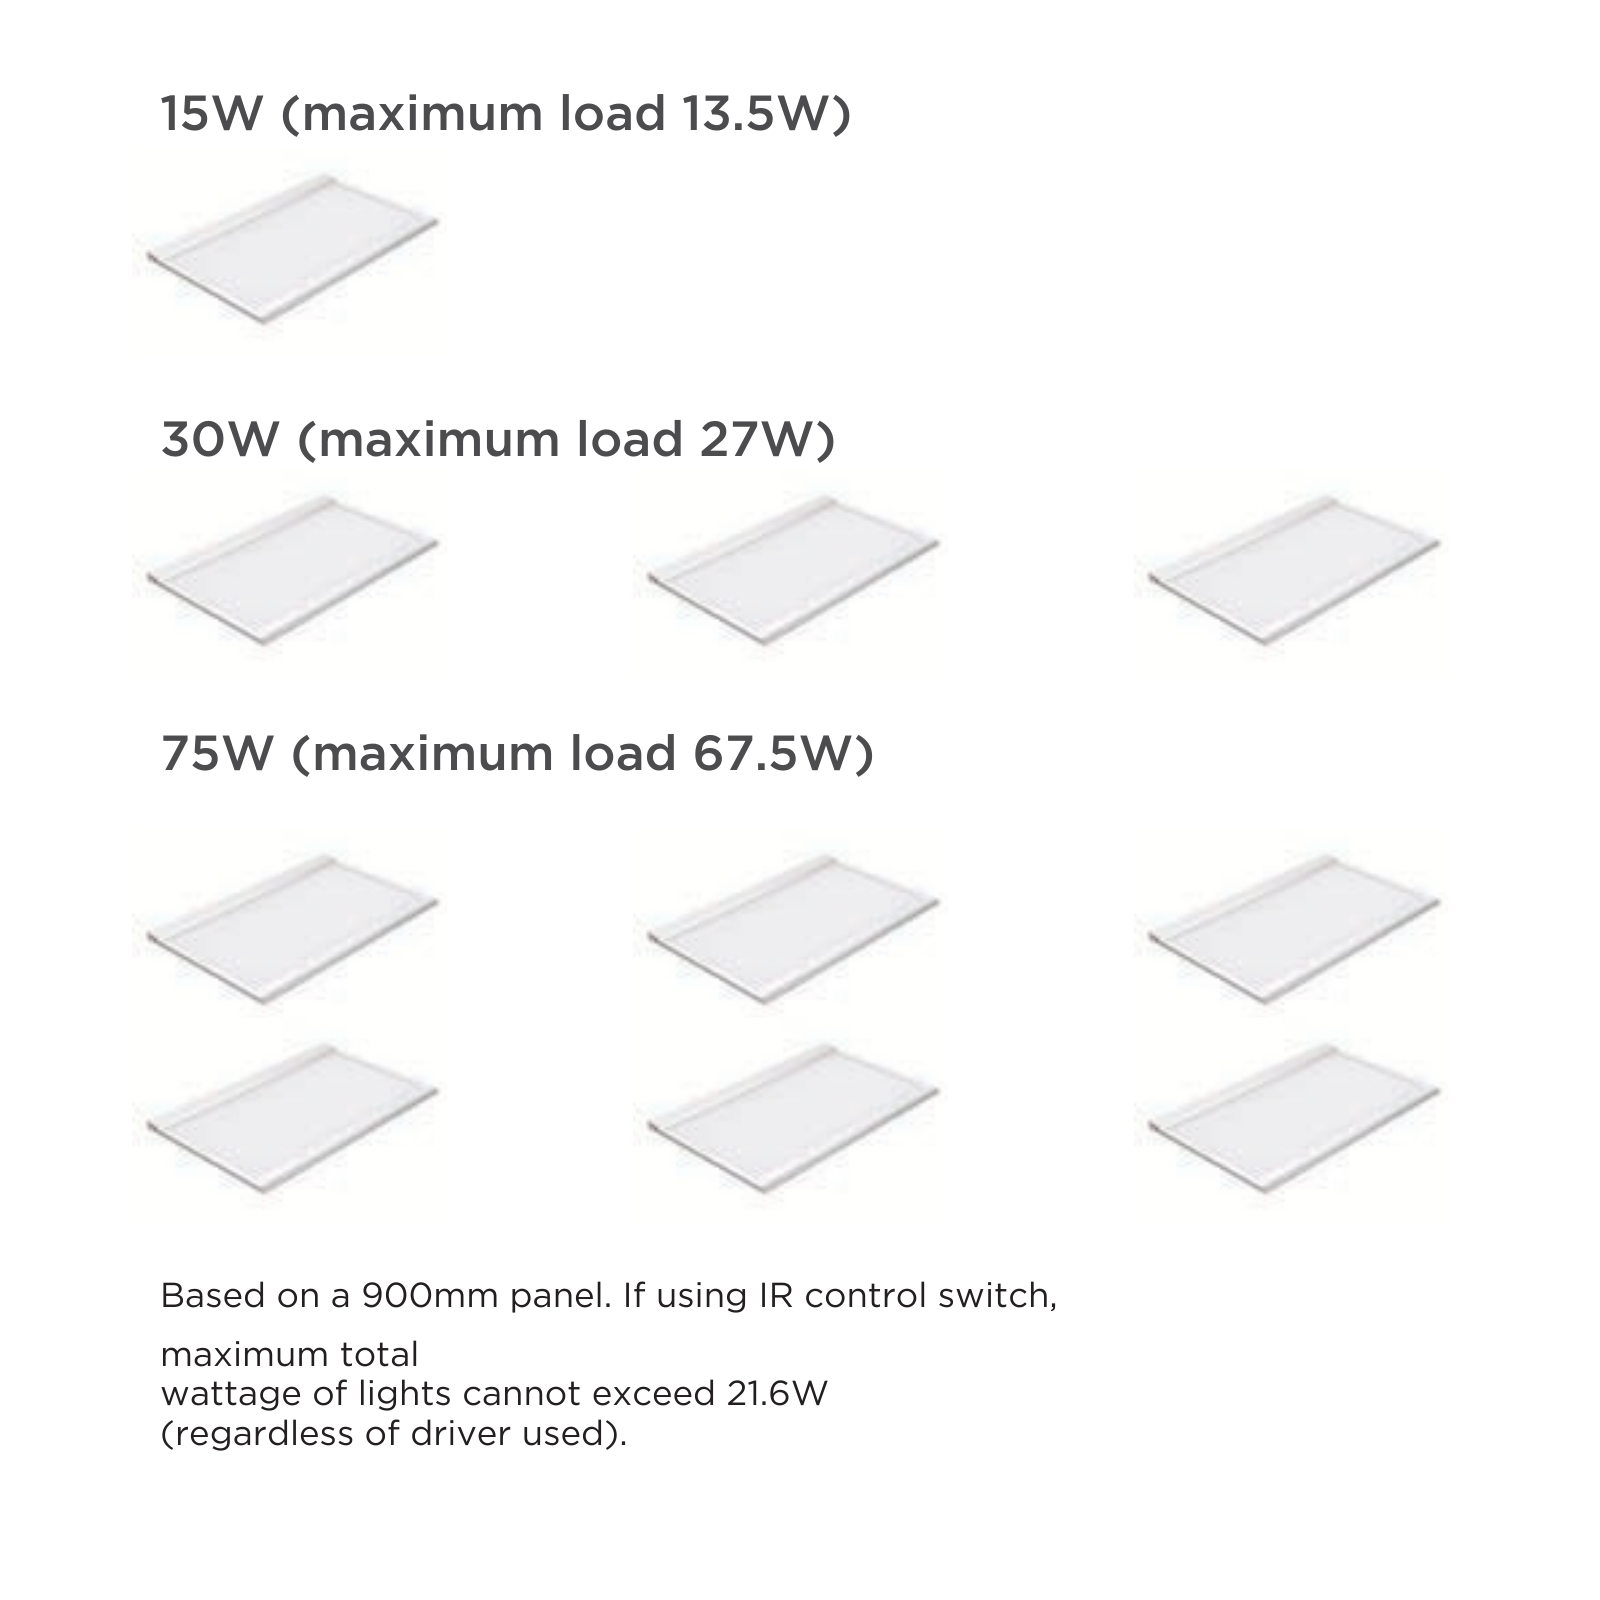
LED driver (connection system). To understand which LED driver you need, simply add up the total wattage of your LED panels and select a drive with a power rating higher than your combined total
Cordless drill with number two screw tip
10mm drill bit
Tape measure
Pencil
Drop sheet
IR control switch with cable (optional: if you want the LED panels to turn on with a sensor)

step 1: follow safety precautions
When using electrical products, make sure the power source has been cut off prior to installation. Do not use this product outdoors or bend the cables. Never operate with a damaged power cord or plug.
step 2: planning your layout
Work out the desired location for your LED panel and the point where you will run the attached power cable through into the cabinet.
step 3: preparing the cabinet surface
Mark the point where the cable will go with your pencil. Be sure to factor in the thickness of the back and side panels when marking out this hole, as well as avoiding any assembly screws that are within the cabinet. Aim to get the hole as close to the inside corner of the cabinet as possible.
step 4: installing the LED panel lights
On your pencil mark, drill a 10mm hole in the base of the cabinet to allow for the power cable to be fed through. Feed the power cable on your LED panel into the hole that you have just drilled and position the panel on the underside of the cabinet while you hold the panel securely in position.
Use your drill to screw in the 20mm screws provided through the mounting holes in the panel into the base of the cabinet.
step 5: wiring the connection system
Connect the power cable to the distributor, which should be connected to your driver. An extension cable is provided if you need increased length to reach your distributor. Plug the driver into your power point and you LED panel is ready to go! If using an IR control switch with cable, make sure to follow the separate installation instructions provided.
You can also watch our step-by-step video below.
We hope we’ve inspired you to elevate your kitchen, study or living room with under cabinet LED lighting – a quick and easy DIY task that’s practical and beautiful.
Please note: kaboodle under-cabinet LED lighting is available in all Australian states; excluding WA.
Although installation video and instructions are for install under a cabinet, there are no major differences when installing under a benchtop. We suggest keeping your transformer hidden near your power supply, and hising your power lead as best as possible which will be dependent on the design of space.
faqs
are Kaboodle LED lights good for kitchens?
Of course! This type of lighting is ideal for illuminating areas which require greater food prep visibility. This particular lighting effect also works for aesthetics.
how long do kaboodle LED panels typically last?
Our LED panels have 10-year warranty
what additional parts do I need to install this LED panel?
You'll need to purchase these items separately: LED driver/power supply and distributor (W-50560, W-50561 or W-50562 depending on the total wattage of all lights being joined). Plus an optional IR control switch with cable if you’d like your panels powered using a sensor (W-50563.)
can I connect multiple panels together?
Yes! Our panels feature a daisy chain connection functionality for ease of installation.
can these LED panels be used for other spaces besides kitchens?
Yes! These multipurpose panels can be used in most rooms. While typically used under-cabinets, they can also be used on low, sloping ceilings.