introducing oyster: the soft, sophisticated neutral
There’s something effortlessly calming about a kitchen finished in muted tones — and our latest trend colour, oyster, is no exception. This cool, grey neutral brings a sense of serenity to any space. Its understated presence, pairs beautifully with metallic accents, such as aluminium fixtures, or industrial splashbacks to create a modern industrial look.
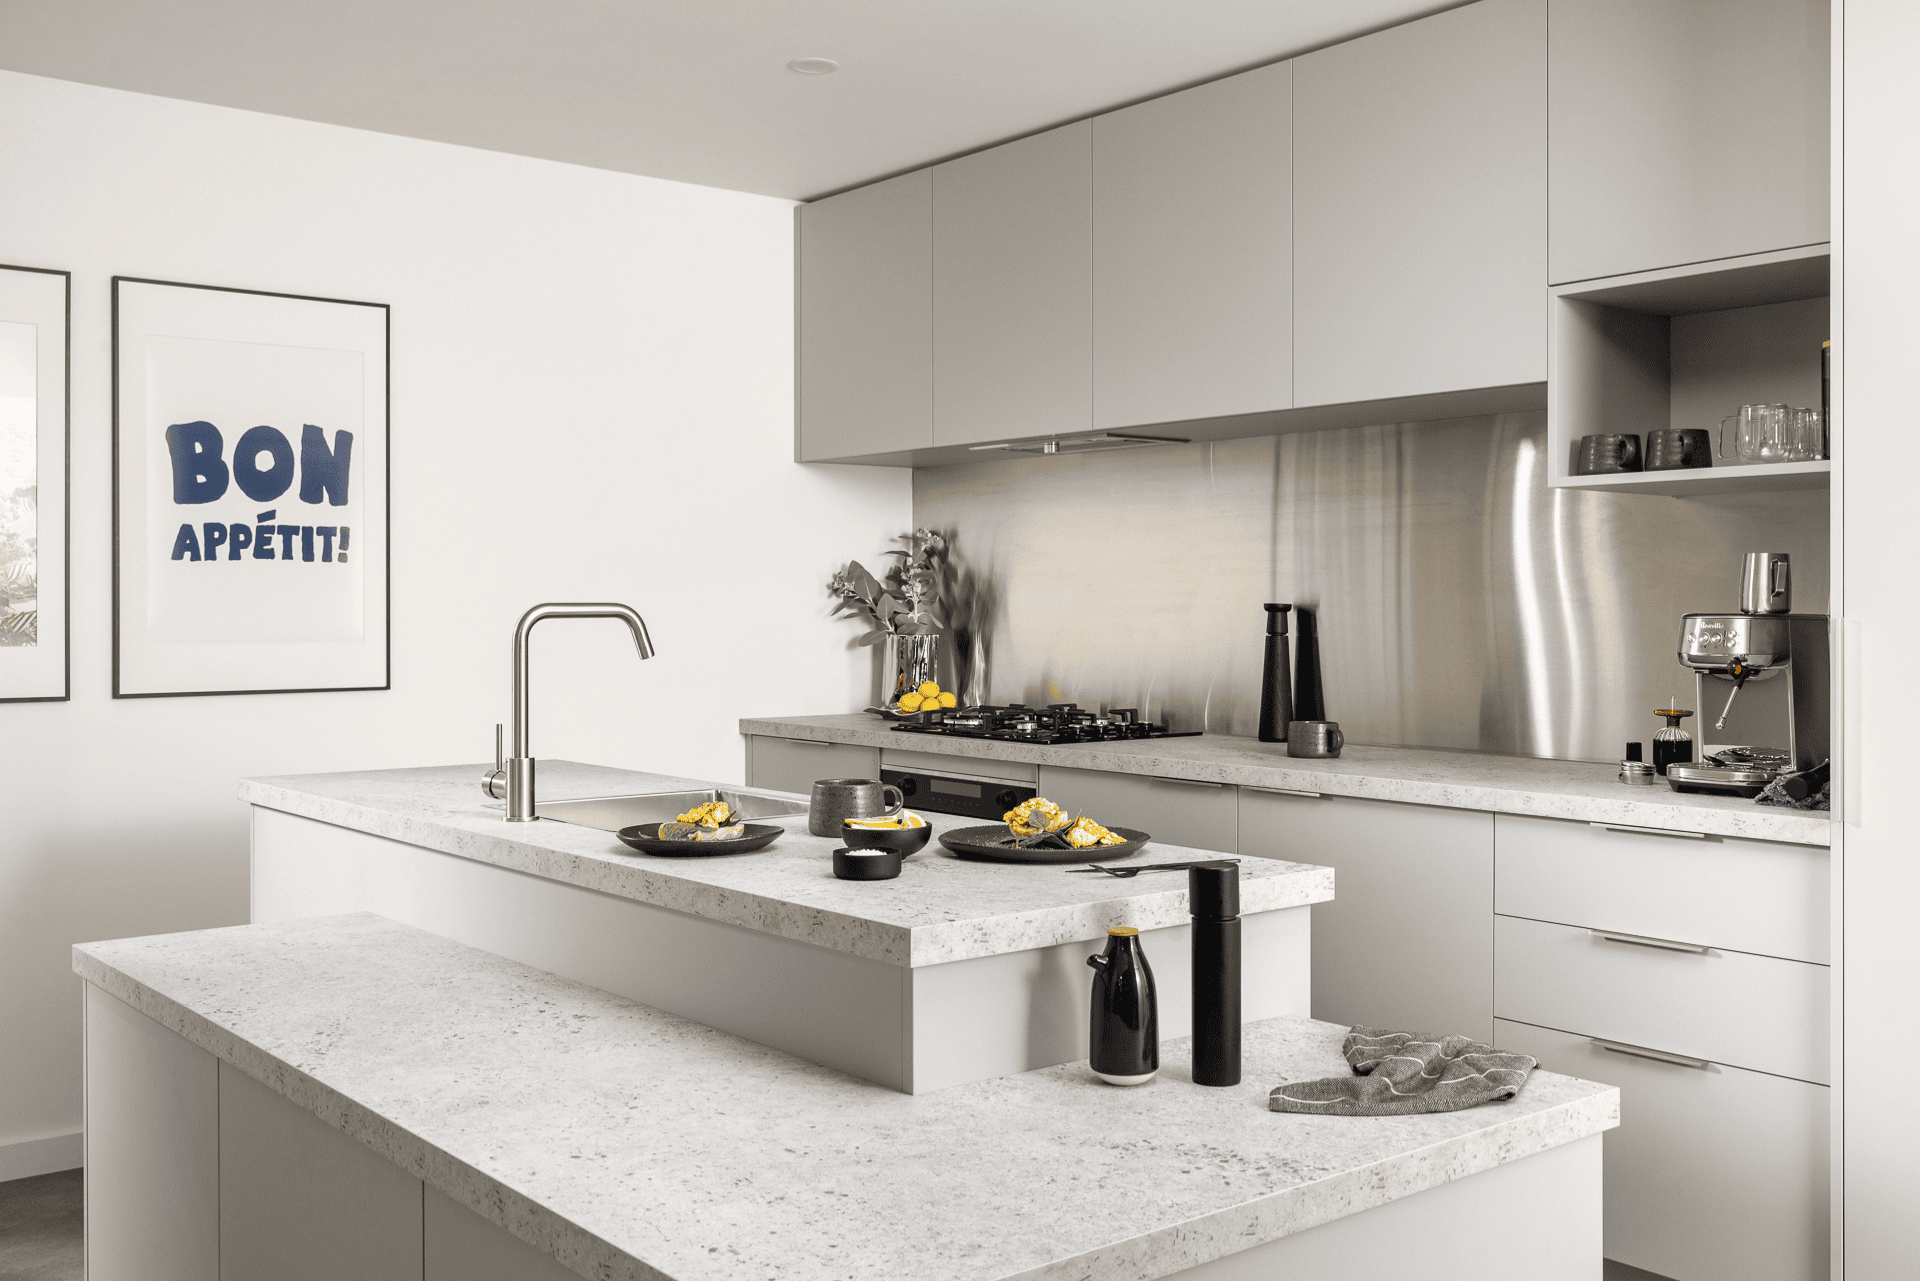
Oyster is part of our new trends colour collection – a palette inspired by nature, designed to elevate your kitchen with timeless elegance. It’s the perfect choice for those looking to create a space that feels fresh, grounded, and effortlessly chic.
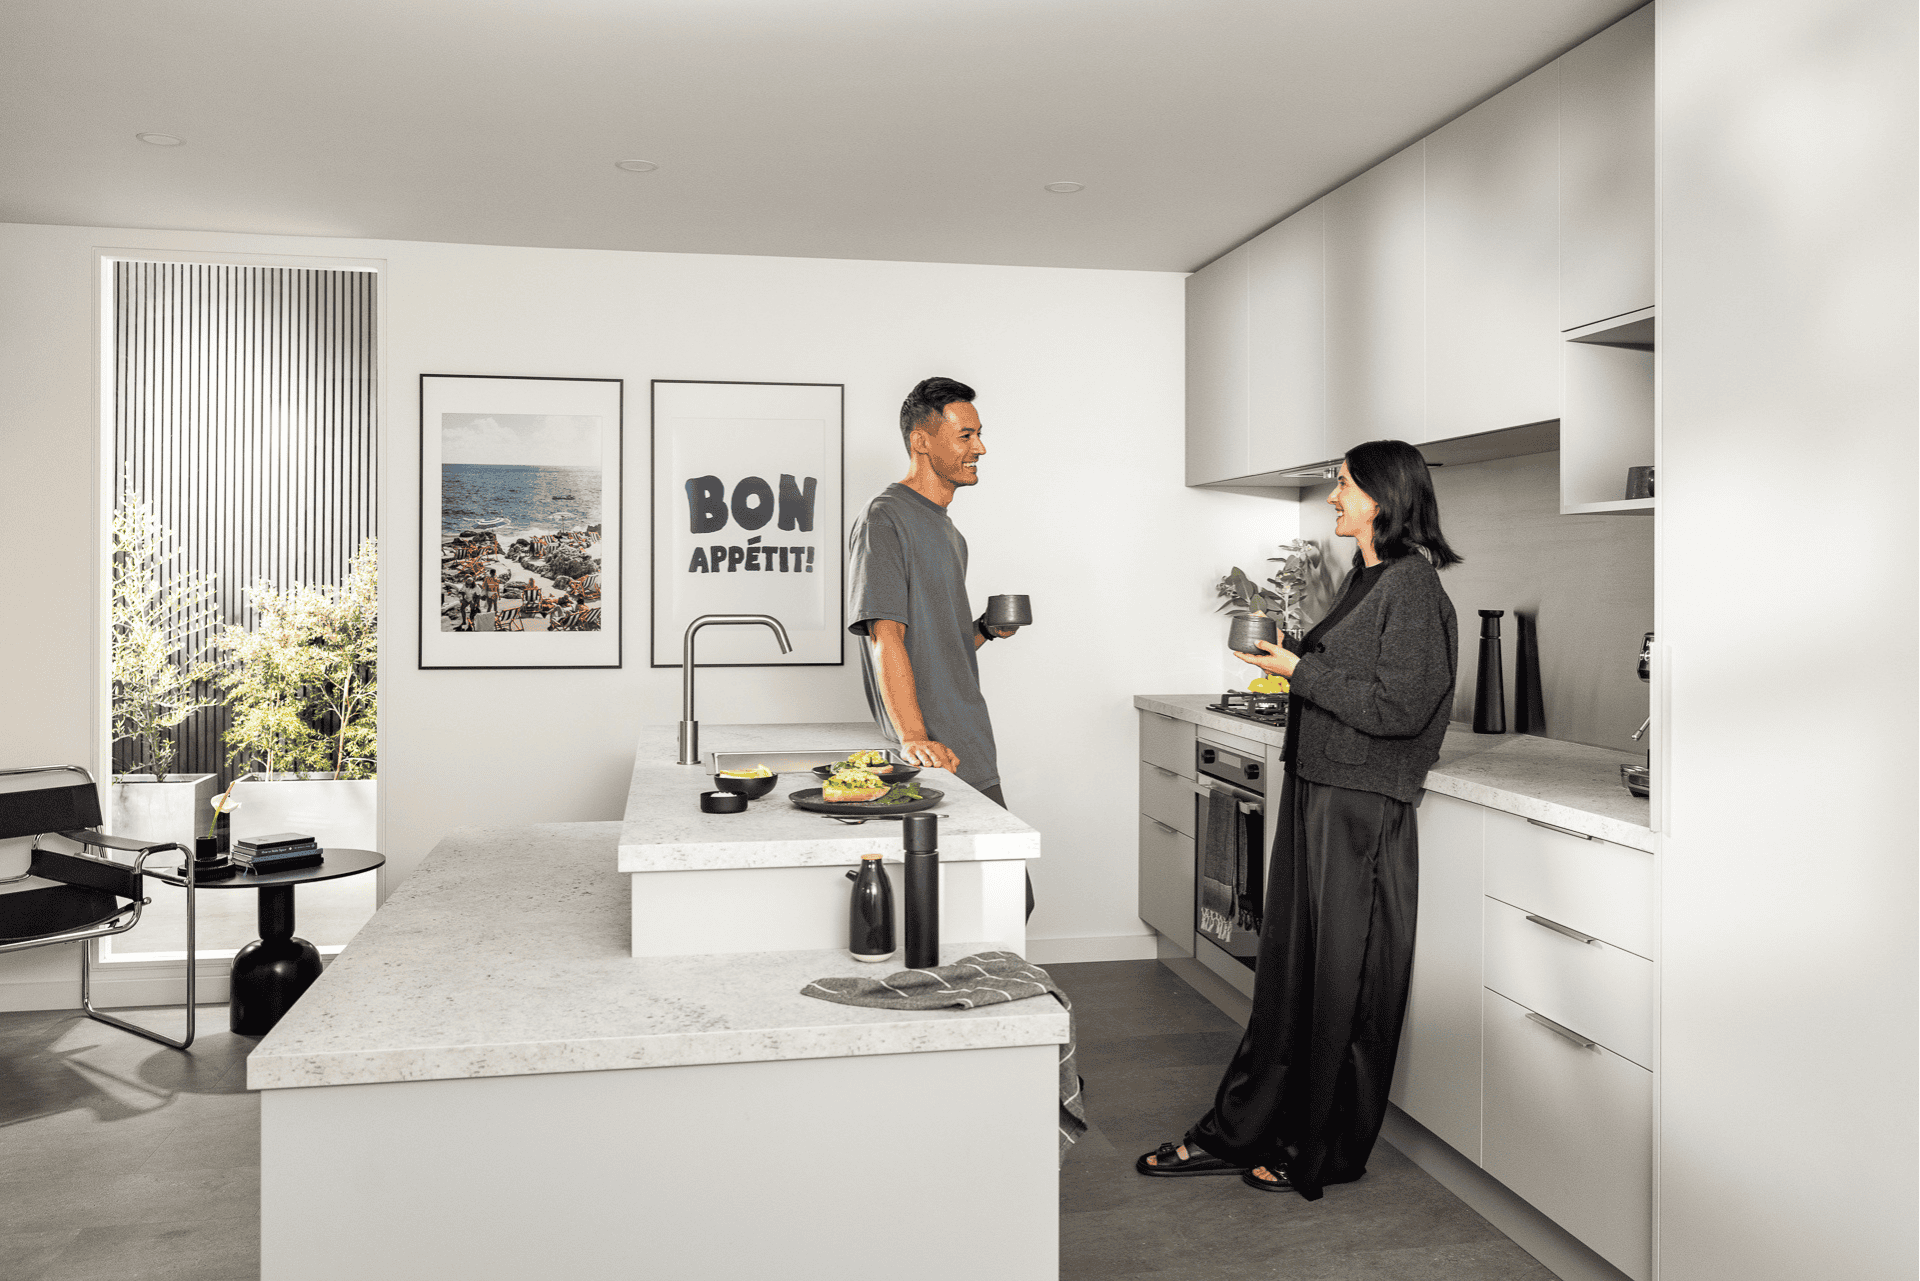
And what better way to hero this stunning new colour than by incorporating it into a modern, functional design feature like a tiered benchtop extension?
how to construct a tiered benchtop extension with oyster
A tiered benchtop extension is a clever way to add extra prep space, a serving zone, or a casual breakfast bar. And the best part? It’s easy to create with our kaboodle products. Here's how you can bring it to life in your next project – featuring our beautiful new oyster finish.
step 1: incorporate it into your initial plan
Make sure you design the extension into your layout from the beginning. Consider where you’ll need extra space and how it’ll integrate with your existing cabinetry.
step 2: order your products
Choose your cabinets, benchtops, and accessories in your preferred finishes.
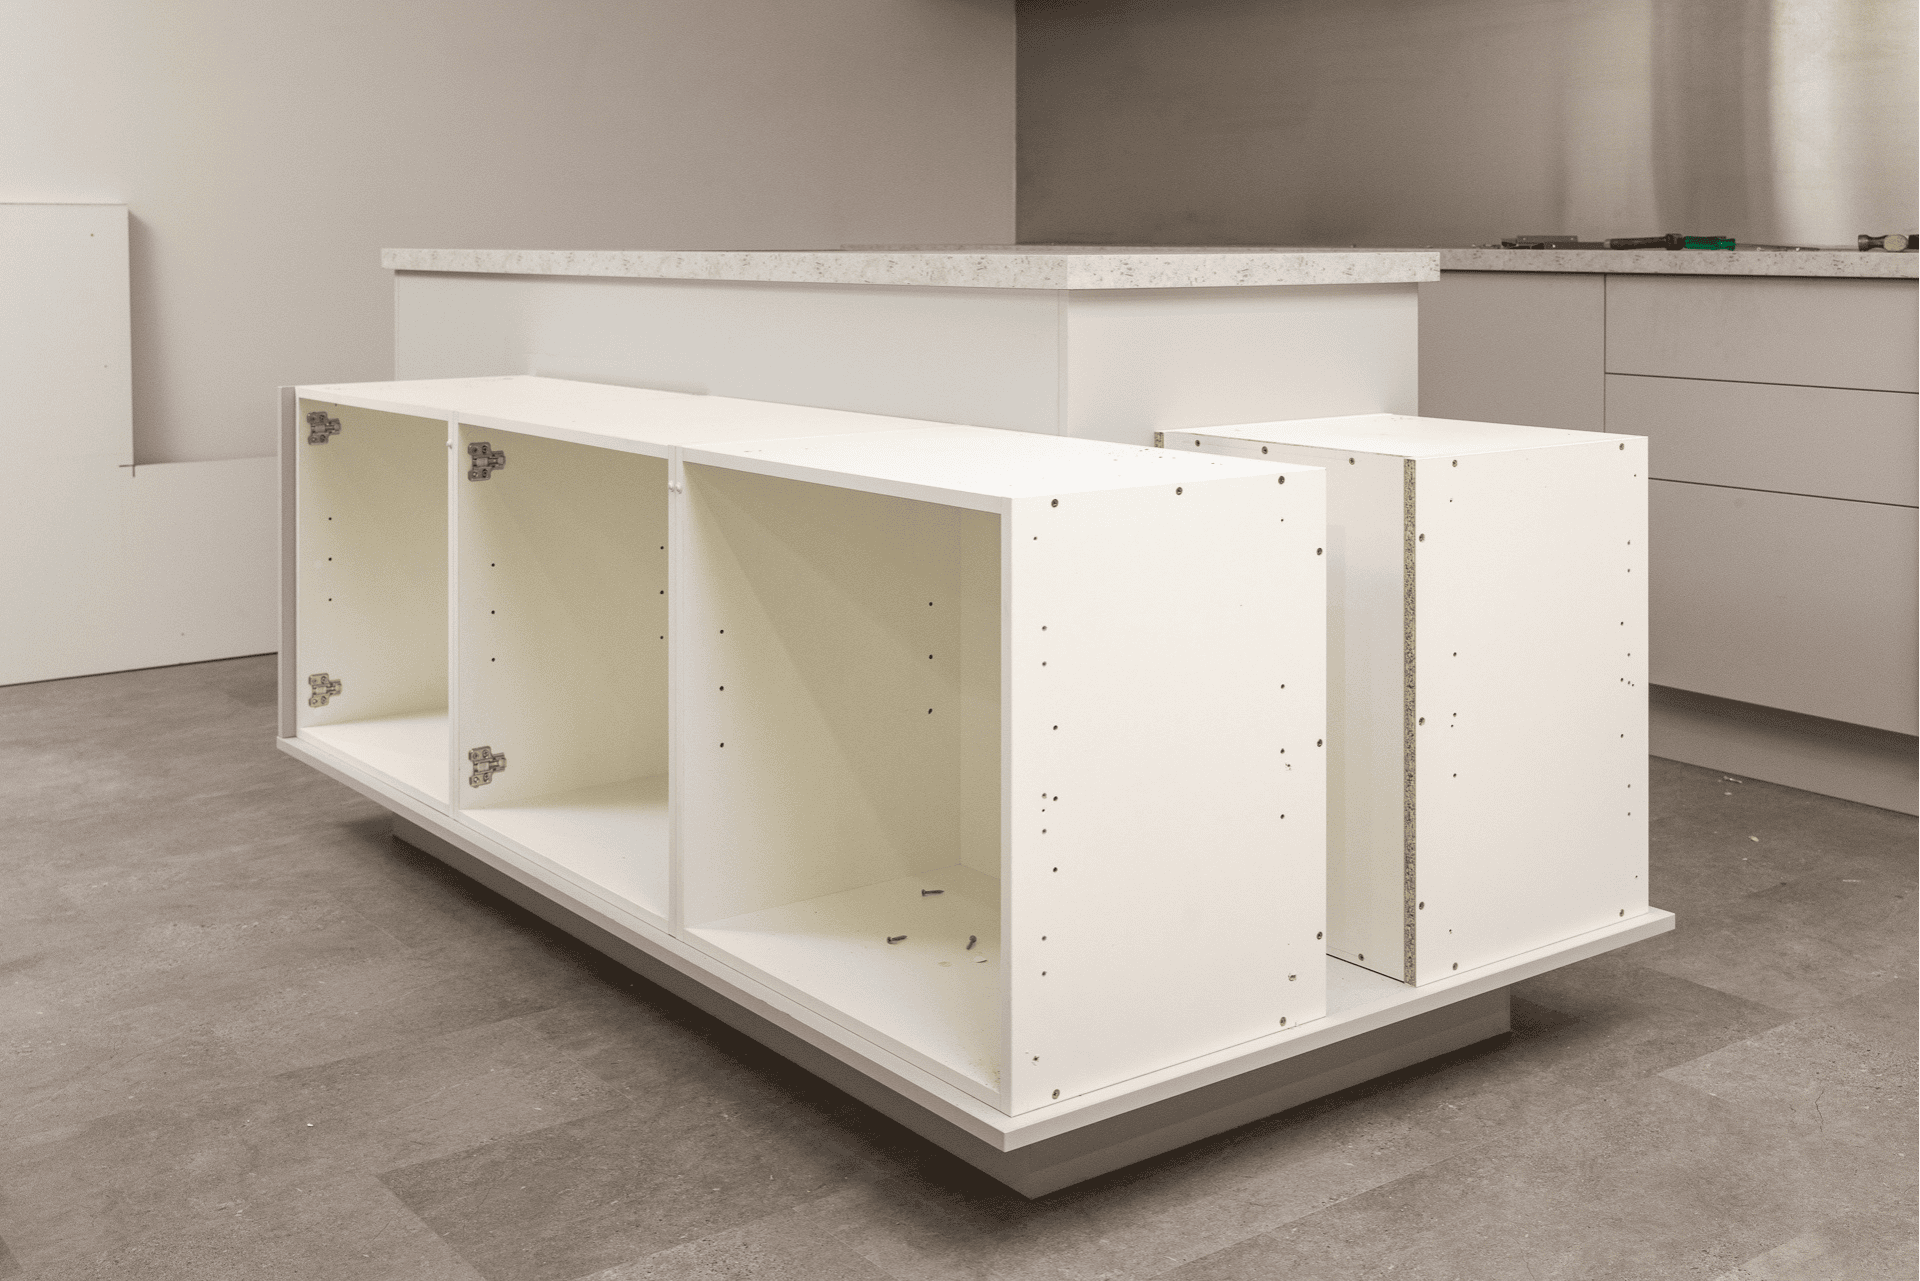
step 3: install the main (tall) benchtop first
As you would normally, install your main benchtop. This will act as the anchor point for your extension. In this case, we used our stone-look lady grey benchtops.
step 4: measure and cut your multi-purpose panel
This panel will form the base of your lower benchtop tier. Carefully cut it to size so it fits hard up around your existing benchtop.
step 5: install the kaboodle under cabinet legs
Attach the legs to your multi-purpose panel, leaving enough clearance to fit your kickboards underneath.
step 6: level your base
Adjust the cabinet legs up or down until your panel is perfectly level and at the desired height for your lower benchtop.
step 7: install your cabinets on top
Place your selected kaboodle cabinets on the multi-purpose panel and secure them in place.
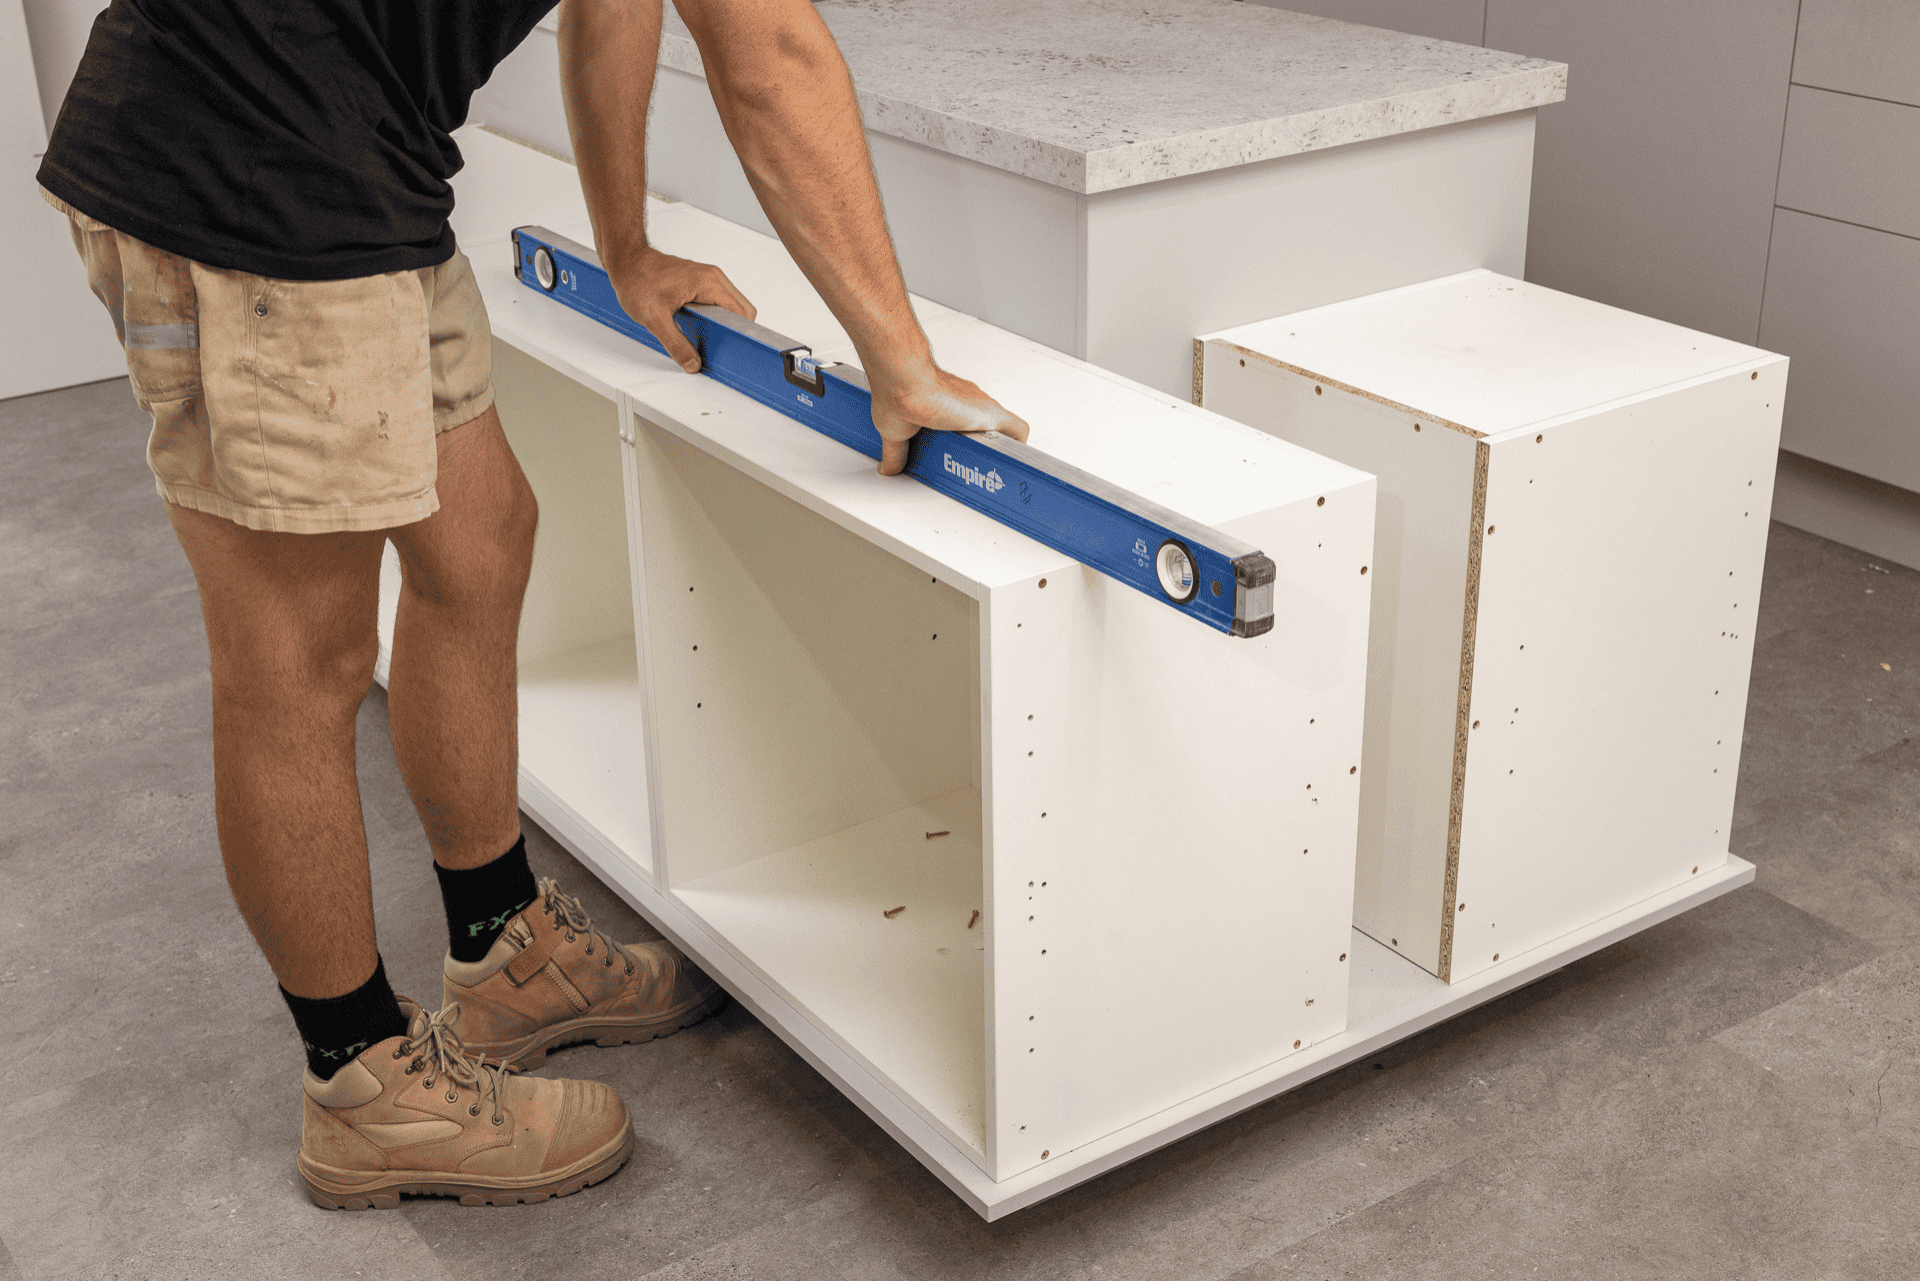
step 8: double-check the level
Use a spirit level to ensure everything is sitting flat and flush across the extension.
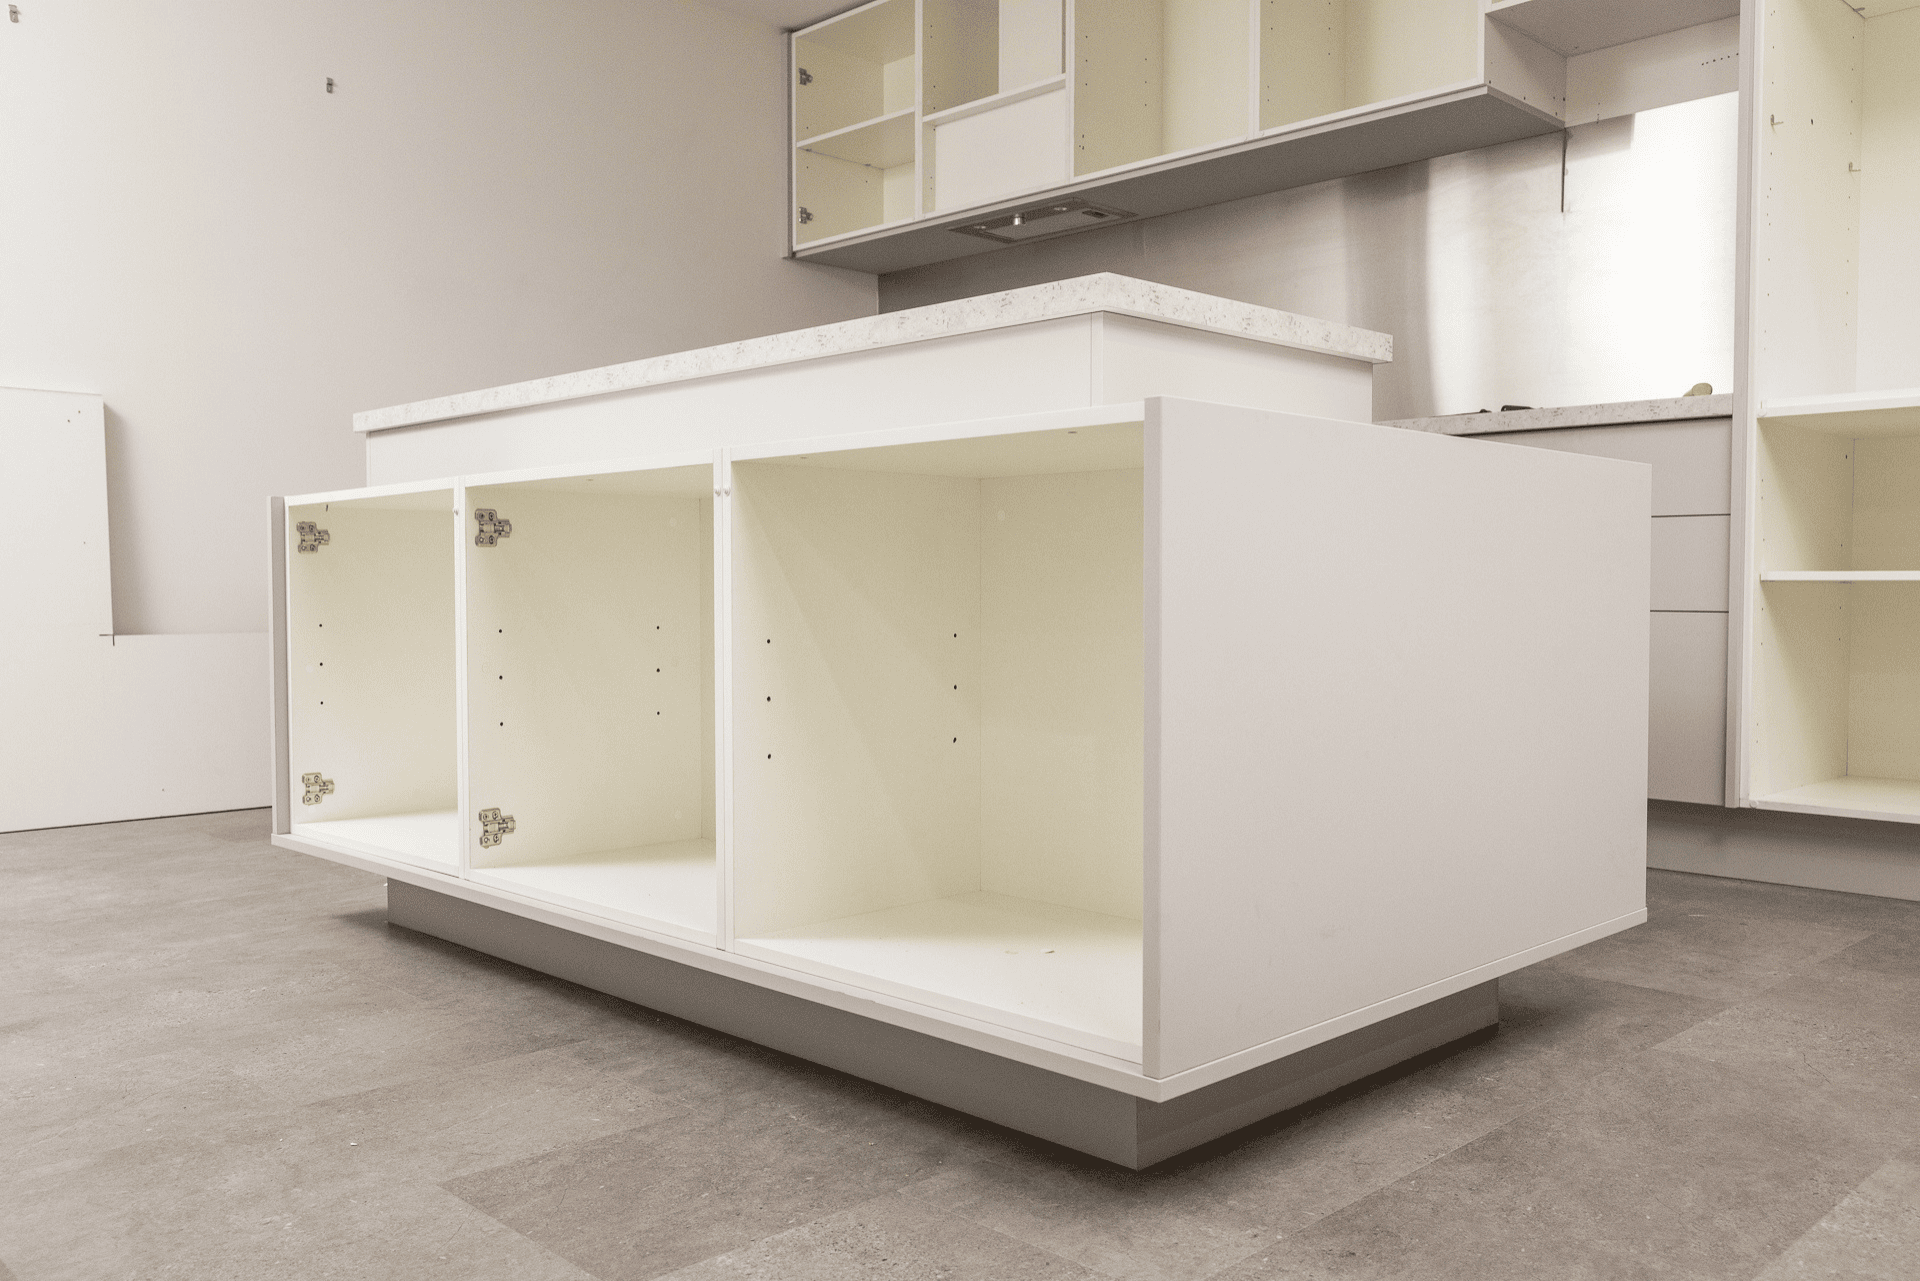
step 9: add your end panels
Install side end panels to frame your cabinets neatly and give the design a finished look.
step 10: measure and cut your benchtop
Cut your lower benchtop section to size, ensuring it aligns cleanly against the existing main benchtop.
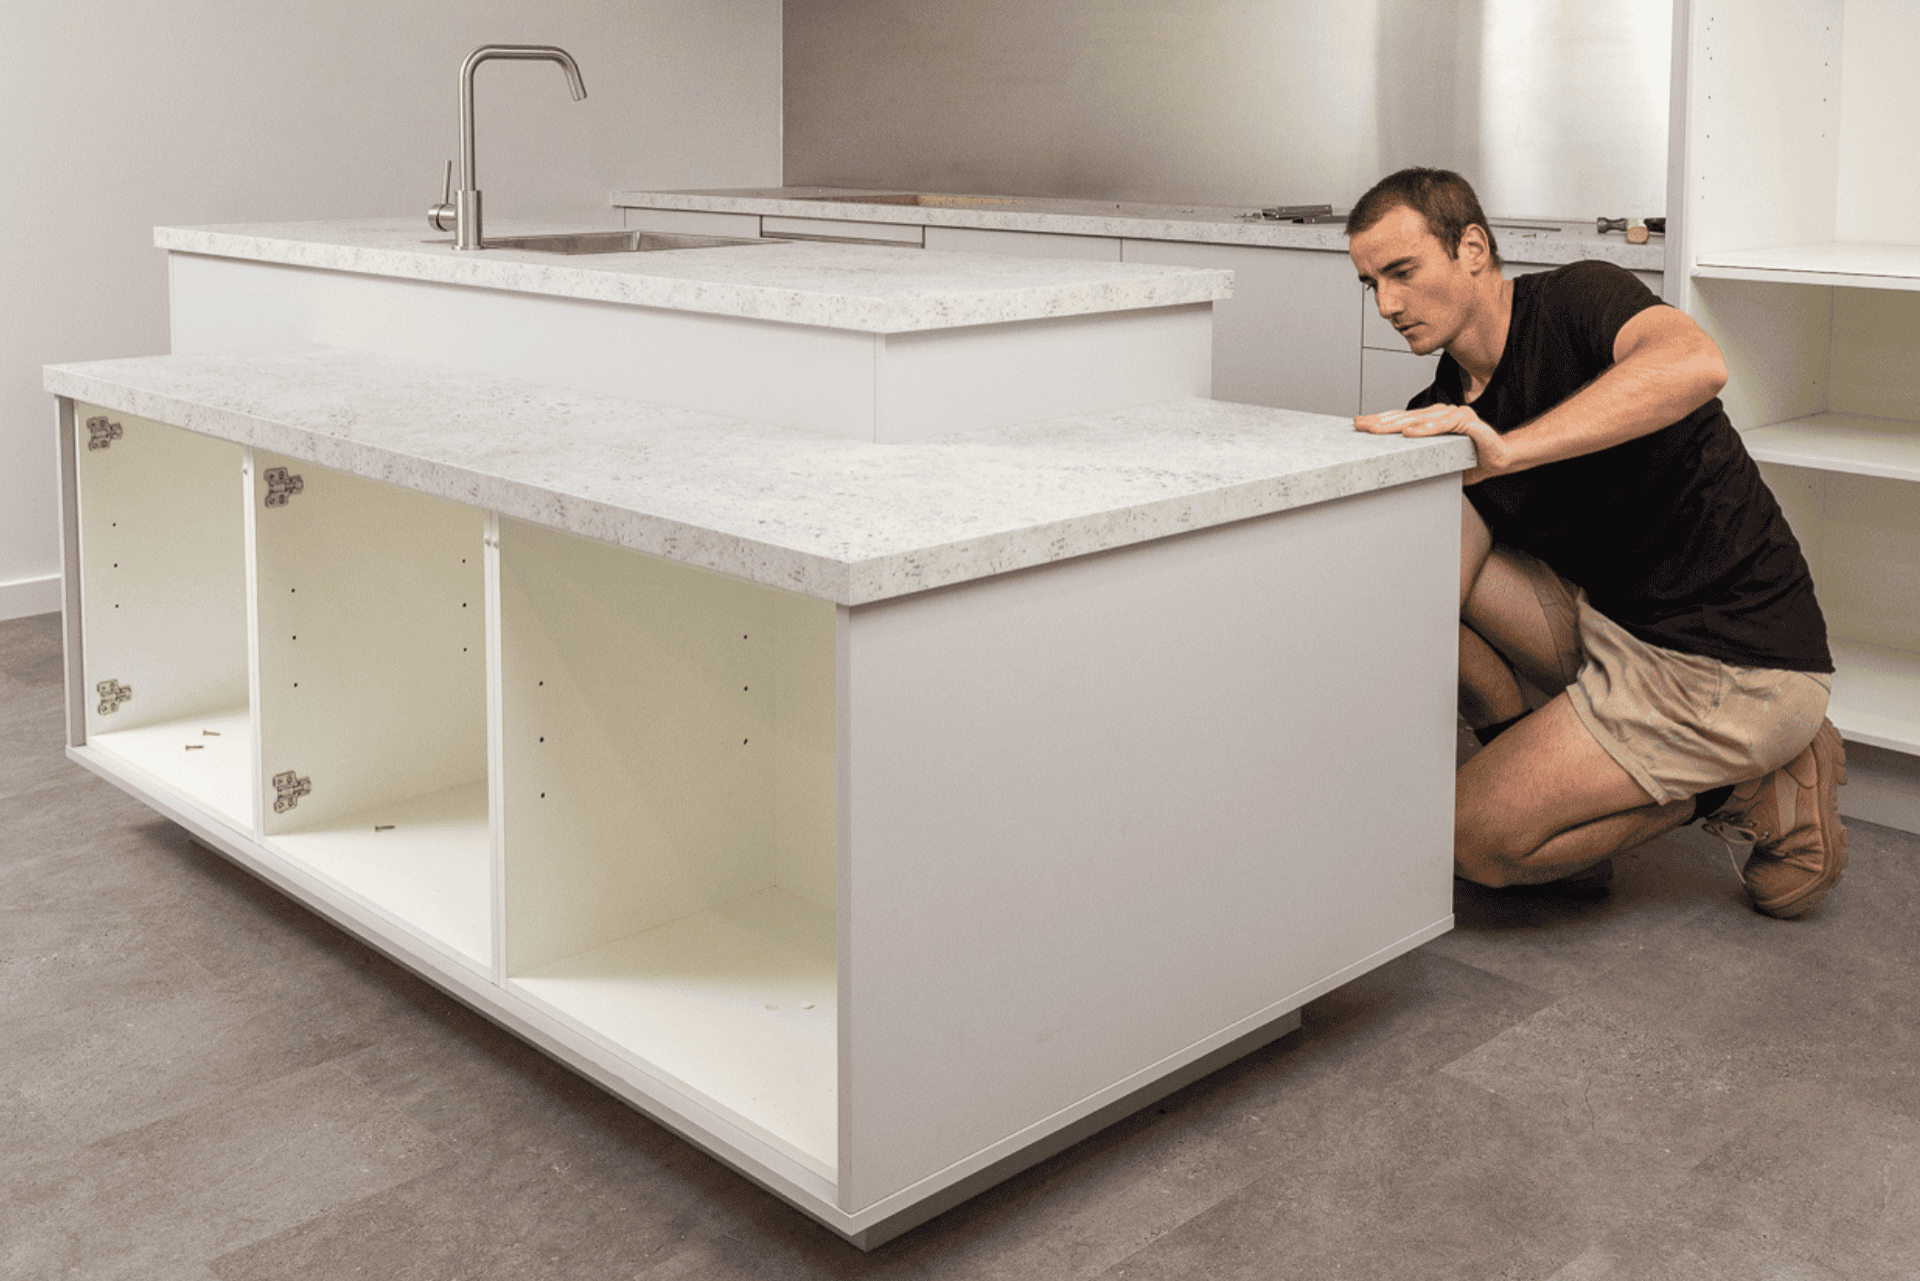
step 11: install the benchtop
Secure the new benchtop in place, fitting it hard up against the taller section for a seamless tiered look.
step 12: cut and install the kickboards
Finally, measure and fit the kickboards to sit beneath your lower cabinets and hide the adjustable legs.
why oyster works so well here?
The oyster finish enhances the layered nature of the tiered benchtop design. Its cool, neutral tone creates a cohesive flow between the different levels while allowing the unique benchtop structure to take centre stage. Whether you're building a relaxed family hub or a sleek entertainer’s kitchen, oyster gives you a versatile, trend-forward base to build on.
Visit your local Bunnings or explore our trends range online to discover how oyster and smart design features like the tiered benchtop extension can transform your kitchen space.
For more ideas and information, visit our design blog and image gallery, or follow us on Instagram, TikTok, Facebook and Pinterest.